
Lion: Creature CFX with Ziva Dynamics
- Apr 6, 2020
- 3 min read
Since I developed my quadruped rigging tool last couple of months.
I have been learning using Ziva Dynamics working on CFX stage(tissue and skin simulation).
It's a powerful simulation software. Ziva software flexible when we have to back and forth to rebuild the simulation scene or update models. They have a lot of information on the Ziva page It easy to learn from there.
I would love to share the CFX process with the Ziva Dynamics tool that I have done in each steps. If you guy has any suggestion or any feedback please let me know.

Clean up the model(muscle&bone) suitable for simulation
geometry naming convention
I suggest creating naming convention the model suitable for split string left to right and type of object. It's very important to continue other processes especially rebuild or mirror setup.

Check the model in each bone&muscle object before going to the muscle simulations stage
I used the Ziva toolkit very useful to check the model.
Such as Run Mesh Analysis, Find intersections, Find Self-intersections

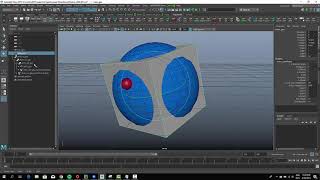
Create Ribcage tissue model
I created ribcage geo by made the ribs into a ziva bone. Then create a simple sphere model and adjust the shape to cover the ribs. Made the sphere into a cloth and used rest-scale/pressure to shrink it down of the ribs. Then retopologized in Mudbox in the next steps.

Retopologized the ribcage model in Mudbox

Then double-check the intersection on the new ribcage model with other muscle objects again.
Muscle setup
Before assigning the Ziva muscle&bone object. I prepare the starter scene template separate animation cache and Ziva object. According to the pictures below, I create ''cacheIn_grp'' under the transform node you can see ''skeleton_geoGrp'' we can update the alembic cache once we have animation update whenever we want.
Then under the 'sim_grp' skeleton_boneGrp same get the animation data from skeleton cacheIn_grp. I made all objects under boneGrp as Ziva bone.

The ''tissue_Grp'' store all the ziva tissue object
I start setup the muscle from ribCage_tissue that we have created before attachment with the ribCage bone object.

Playback to check the dynamic of ribCage_tissue.

Then I'm continuing the muscle setup on the back leg part. Until full body.

After I finished the left side setup I use the script to help to generate the right side automate.

Muscle simulation output

After finished the muscle simulation. I can all muscle as alembic cache out. for simulation fat in the next steps.
We can find more Technic such as muscle fibers, Line of Action on the Ziva page.
https://zivadynamics.com/resources/welcome
Create Fascia model
I did the same concept with the ribcage tissue that I did before. I made all muscles as ziva bone. Then used rest-scale/pressure to shrink it down.

Clean up the fascia mesh


Create Fat model
I did the simple way in Maya by reverse the face normal of fascia mesh then extrude the edge of the original model make the Bridged to make watertight mesh (Yellowface are) then combine those mesh and merge the vertex. **In case we have retopologized the fascia mesh. We can create the new outer skin by using the fascia wrapped to the original model then make the Bridged to make watertight mesh combine and merge vertex.


Fat/Skin setup
I created the fat starter scene with the same concept as the muscle scene.
but the scene I make all muscle as ziva bone. And made the fat model as ziva tissue.

Setup slide attachment between tissue and muscles. Also, Painting material layer on specific are.


Inner material layer setup by used rest-scale/pressure to shrink it down of the muscles.

zFiber setup on the area.

After finished all attachments, paint the materiel setup. I import bone and muscle cache data into the scene.
Then run the fat tissue simulation. After that, I export the alembic cache data for cleanup and wrap it to the original skin model in the next steps.
Fat simulation output

Wrap scene
Using the original skin model wrap with the fat CFX mesh.

Painting blendshape between skin cluster&CFX mesh

CFX skin(without wrinkle) output

Export alembic cache of the blending skin for blending with skin wrinkle version the next steps.
Skin Wrinkle setup
Prepare a skin model with a triangle face using the ''Meshmixer'' software.

Create a starter skin simulation scene. Made the fat as ziva bone and triangle skin mesh as ziva cloth. Made attachment skin mesh with fat bone. Adjusting the stiffness attribute on the zMaterial. How many wrinkles do we need it?

Skin+wrinkle simulation

After that export cache of the triangle mesh with wrinkles to do the wrap with original skin. Then update cache the new skin with wrinkles into the blending scene that we have done before.
Then using the skin with wrinkle detail paint blendshape with the first CFX skin we have done before by painting on the area that you expect to have the wrinkled detail.


Final skin with wrinkle detail

Feel free to leave your feedback or any thought.
Thank for watching!
Paween
![Creature rigging system (Animation rig state [WIP])](https://static.wixstatic.com/media/a3258f_7e3d91d61b8148dcaf4f35639cfb8349~mv2.gif)


wow. that is amazing. did you have to make the muscles yourself, and then attachments, and activations?